• 3D列印服務
  • #maker+t=market
  • 1
  • 2

Anycubic Photon Printer Owners 造訪社團

原文網址 Duncan Nodarse
2019-01-09 11:55:14

So, I just ordered a 500g bottle of green resin, and it is a different shade of green compared to the green resin I was given with my printer. I just did a print, and the print failed. I looked at the bottle and noticed that the exposure time was different than the original one I have. So my question is that if I am doing a 20 micro layer height print, what should the settings look like (exposure time, layers, etc). I do not want to have another failed print, because I really do not like having to clean up the mess that results from one.

翻譯年糕

Dave Coggan
2019-01-09 12:01:17

Robert Silvers
2019-01-09 12:06:09

Dave Coggan
2019-01-09 12:07:20

Duncan Nodarse
2019-01-09 12:15:10

Duncan Nodarse
2019-01-09 12:16:43

Dave Coggan
2019-01-09 12:18:07

Duncan Nodarse
2019-01-09 12:19:23

Dave Coggan
2019-01-09 12:40:34

Duncan Nodarse
2019-01-09 12:48:04

Dave Coggan
2019-01-09 12:50:21

Dave Coggan
2019-01-09 12:53:01

Sen Kun
2019-01-09 16:01:56

Dave Coggan
2019-01-09 21:19:45

Michael Earley
2019-01-09 21:21:32

Michael Earley
2019-01-09 21:21:59

Dave Coggan
2019-01-09 21:29:51

Guajolote Messias
2019-01-09 21:55:41

Duncan Nodarse
2019-01-10 01:14:49


原文網址 Daniel Sparky Browncow
2019-01-09 11:25:51

I am a little confused.

I ordered a z leadscrew for 'Photon' from the ''ANYCUBIC Official Store'' on AliExpress, to replace a bent one (Bottom) and received this (Top).

The replacement screw is 60mm longer than the original with wrong pitch/lead, as well as being a smaller NEMA.

It is the ONLY leadscrew assembly available in the store, as well as being the only one listed for the photon in all of aliexpress.

Are they taking the p!ss or is this a genuine mistake?

翻譯年糕

Richard Shapiro
2019-01-09 11:30:22

Daniel Sparky Browncow
2019-01-09 11:43:39

Johnathan Chamberlain
2019-01-09 12:14:44

Daniel Sparky Browncow
2019-01-09 12:18:17

Sen Kun
2019-01-09 16:22:52

Daniel Sparky Browncow
2019-01-09 16:27:48

Sen Kun
2019-01-09 16:33:12

Johnathan Chamberlain
2019-01-09 21:23:16

Daniel Sparky Browncow
2019-01-23 13:13:05

Sen Kun
2019-01-23 16:21:41

Sen Kun
2019-01-23 16:24:11

Daniel Sparky Browncow
2019-01-23 16:39:13

Martin Souček
2019-01-23 16:52:55


原文網址 Robert Silvers
2019-01-09 11:05:42

Instructions for printing close-tolerance parts:

First step is see where you are at by printing my test-gauge set: https://www.thingiverse.com/thing:3325364

The most precise resins will allow the GO -0.1 pin to pass through the ring but the NOGO +0.1 should not go through. Any resin that can do that needs no further action. See list of resins already tested here:

https://docs.google.com/…/1yDwszgncTyOxvyJho6y1kxLJquH2GsfL…

If your print will only allow the GO -0.2 or GO -0.3 to pass through, then it is printing over-sized and needs corrective-action. I have worked with the developers to get two programs so far to offer this correction.

Method 1 (easy way): Buy Formware https://www.formware.co and set up a printer profile for that resin and put in the correction based on the gauge reading. So if the gauge would only allow GO -0.3 to pass, then use a value of 3 pixels or -0.15mm / -150 microns.

Method 2 (hard, but free): Go to this site and click on Clone or Download: https://github.com/Photonsters/VoxelsOps

Also download Node and install it: https://nodejs.org/en/download/

Select Download Zip and unzip it somewhere. Open a command-line shell and go to the directory that you unzipped it. Type commands 'npm i' then change directory to app, and do 'npm i' again.

Back out of apps, and go into directory helpers. There is a command called erode.js

Run this command with 'node erode -s yourphotonfile.photon -x 1 -y 1 -z 0 -d path-to-emty-dir-to-put-slices-into

Now go here and install PhotonFileEditor by following the instructions on that page:

https://github.com/Photonsters/PhotonFileEditor

Now load your original .photon file into the editor. Then import the slices that VoxelsOps generated. Then save out the photon file again.

That is all.

Future plans: Voxels Ops may get easier to use by writing photon files directly, so that PhotonFileEditor is not needed. And, PhotonOpenSlicer may end up having this horizontal size compensation, in which case it would just be a matter of saving your STl to a folder that PhotonOpenSlicer monitors and it would just automatically generate the photon file for you. Thirdly, ChiTuBox said they would add this feature to a future paid version.

翻譯年糕

Dustin Scott
2019-01-09 11:31:54

Kristian Domingo
2019-01-09 11:43:47

Robert Silvers
2019-01-09 11:52:42

Richard Shapiro
2019-01-10 13:01:42

Nathaniel Silva Nerona
2019-01-10 13:11:08

Robert Silvers
2019-01-10 13:27:29

Ryan Blacklaws
2019-01-12 06:18:28

Robert Silvers
2019-01-12 06:30:14

Ryan Blacklaws
2019-01-12 06:31:33

Robert Silvers
2019-01-12 06:34:35

Ryan Blacklaws
2019-01-12 06:39:09

Elco Jongejans
2019-01-12 16:49:32

Ryan Blacklaws
2019-01-12 19:05:30

Ingo Strohmenger
2019-04-03 17:22:38

Ingo Strohmenger
2019-04-03 17:24:42

Tomas Mitrano P.
2019-07-21 09:35:20

Robert Silvers
2019-07-21 09:36:25


原文網址 Skeet Karsgaard
2019-01-09 10:47:13

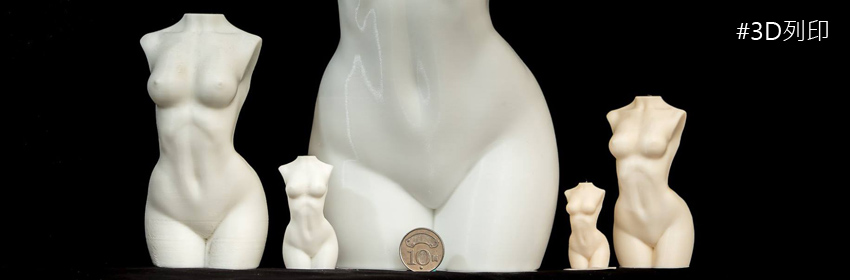
Here are my 6 inch tall parents, I have been without my photon for the holidays while visiting them so I scanned them so they can now visit me.

翻譯年糕

Donovan T Scheirer
2019-01-09 11:24:30

Jennifer Crowe
2019-01-09 11:30:03

Blaine Tsukayama
2019-01-09 11:36:29

Fernando Toledo
2019-01-09 11:38:51

Erick Van Patten
2019-01-09 11:48:43

Marshall Tearle
2019-01-09 11:49:47

Garret Bertrand
2019-01-09 12:32:15

Roger Fenton
2019-01-09 17:23:12

Skeet Karsgaard
2019-01-09 20:35:32

Skeet Karsgaard
2019-01-09 20:36:39

Richard Wilson
2019-01-09 22:15:52

Martin Jonsson
2019-01-10 10:00:51

Tero Konttila
2019-01-11 23:06:24


原文網址 Dustin Scott
2019-01-09 10:12:38

Had a perfect build plate level for weeks, accidentally dropped it while removing a print, now I can't get the plate leveled. When the plate is "level" it's nice and tight, however when the first layer prints it sticks and no other layer will stick after. Checked the plate on a "dry run" and it appears the plate is tilted forward.

Doesn't matter how many times I watch the videos or try and re-level, I can not get the plate to stay straight.

Checked for warp from the drop, none.

翻譯年糕

Guajolote Messias
2019-01-09 10:20:08

Guajolote Messias
2019-01-09 10:20:25

Guajolote Messias
2019-01-09 10:20:33

Guajolote Messias
2019-01-09 10:20:40

Guajolote Messias
2019-01-09 10:20:46

Sen Kun
2019-01-09 18:42:19


原文網址 Brian Young
2019-01-09 09:49:51

Any zbrush users here that can share their tips? How much do you decimate your models? What are best settings? Etc. Also any pictures you could share?

翻譯年糕

Pinyo Gulashart
2019-01-09 15:52:00

Francesco Antonio Pizzo
2019-01-09 16:04:47

Julia von Pfaler
2019-01-09 17:58:37

Mathieu Larno
2019-01-09 18:25:37

Brian Young
2019-01-09 19:02:54

Seona van der Pol
2019-01-09 19:08:20

Fabio Rizzo
2019-01-09 20:06:00

Velvet Mark
2019-01-09 21:30:31


原文網址 Vinicius Silva
2019-01-09 09:43:01

First try at rebuilding a Photon sliced file into a 3D model again using the Brazilian Open Source CAT scan rebuilder InVesalius. The rebuild is from Ivan Antharon Antalec Gyroid infflied Ogre that was hollowed with Voxel Ops

Obviously something is screwey with the import ratio, I think the CAT software is expecting a Square image

Thanks to Tero Konttila for sharing with us the CAT software find

UPDATE: Lateste version can import non square images without a problem, and feels faster and more precise too (2nd Photo)

Here is the link: https://github.com/…/v3.1.99…/invesalius-3.1.99992-win64.exe

--------------------------------------
Original model and Voxel Ops Gyroid infill post Here:
https://www.facebook.com/groups/AnycubicPhoton/permalink/1463108527167118/

Source files can be found on Photonsters.org experimental prints folder, both presliced and isolated images

翻譯年糕

Vinicius Silva
2019-01-09 09:58:21

Ivan Antharon Antalec
2019-01-09 13:48:14

Tero Konttila
2019-01-09 14:26:28

Tero Konttila
2019-01-09 15:06:26

Tero Konttila
2019-01-09 15:20:10

Tero Konttila
2019-01-09 15:25:00

陳彦廷
2019-01-09 17:51:26

Tero Konttila
2019-01-09 21:14:13

Tero Konttila
2019-01-10 17:31:19

Vinicius Silva
2019-01-11 08:44:01

Vinicius Silva
2019-01-11 09:01:32

Vinicius Silva
2019-01-11 22:19:59

Tero Konttila
2019-01-11 22:21:18

Tero Konttila
2019-01-11 22:27:36

Vinicius Silva
2019-01-11 22:27:47

Vinicius Silva
2019-01-11 22:28:54

Tero Konttila
2019-01-11 22:33:15

Tero Konttila
2019-01-11 22:39:22

Tero Konttila
2019-01-11 22:39:29

Vinicius Silva
2019-01-11 22:55:58

Tero Konttila
2019-01-11 23:00:02

Vinicius Silva
2019-04-03 18:25:39


原文網址 Charles Grigg
2019-01-09 09:22:33

anyone have settings for WANHAO resin?

翻譯年糕

Charles Grigg
2019-01-09 09:23:26

Charles Grigg
2019-01-09 09:23:39

Charles Grigg
2019-01-09 09:42:38

Vinicius Silva
2019-01-09 09:55:49

Charles Grigg
2019-01-09 10:03:02

Dustin Scott
2019-01-09 10:04:39

Charles Grigg
2019-01-09 10:05:43

Charles Grigg
2019-01-09 10:05:48

Dustin Scott
2019-01-09 10:06:31

Charles Grigg
2019-01-09 10:07:15

Charles Grigg
2019-01-09 10:07:28

Charles Grigg
2019-01-09 10:08:16

Charles Grigg
2019-01-10 11:25:30


原文網址 Robert Silvers
2019-01-09 08:53:54

Printed in Blu, so I didn't need any size compensation. Try to print it. Use the version with support already on it, and cut the supports with a micro flush-cut tool.

https://www.thingiverse.com/thing:3336821

https://www.amazon.com/…/B07…/ref=oh_aui_detailpage_o02_s00…

翻譯年糕

Mattias Fb-konto
2019-01-09 13:40:01

Marcello Ganzerli
2019-01-09 15:28:09

Sen Kun
2019-01-09 15:48:51

Robert Silvers
2019-01-09 19:19:22


原文網址 김경록
2019-01-09 08:21:43

Is there any tip when adjust build plate's horizontality against the LCD panel? It keeps slightly tilted whenever I did z-axis calibration

翻譯年糕

Vinicius Silva
2019-01-09 08:23:07

Che Fielding
2019-01-09 19:36:25


討論主題

發文排行榜

回文排行榜

熱門關鍵字